
Getting started
Welcome to InstantVoice! This is a quick guide to configuring a two-brick distributed installation for inbound and outbound calls. Although we will stick to the basics, the guide gives you enough information to get started and grow. By the time you get through it, you will be able to:
- Configure additional servers for use in your InstantVoice cluster.
- Add and configure SIP trunks.
- Create new extensions, queues, and agents.
- Structure basic IVRs according to your needs.
- Route outbound calls appropriately.
If you need more information than is provided here, please visit http://www.instantvoice.net and check out our support options.
Installing the ACD Server
We will begin by installing the ACD server, from here on referred to simply as the ACD.
Prerequisites
Before you begin, you should have two InstantVoice compatible servers (from here on out referred to as bricks) ready for installation. This means:
- They should have an i386 compatible processor.
- Each brick needs one hard drive with at least 8 GB free for a new partition.
- They must each have a functioning network interface connected to the same network.
- Each one needs an optical drive to read installation media.
If configured properly, virtual machines will work just as well, but we recommend “bare metal” installations for production use.
To complete this guide you will also need at least one SIP IP phone (of the soft or hard variety) and a SIP DID provider to make and receive calls. This provider may take the form of an internet SIP service, a local SIP gateway, or even a SIP phone that can handle IP calls.
Finally, you should also have downloaded and burned the installation media to a CD or DVD. Once you have your boxes and installation media ready, continue with the guide.
Beginning the Installation
Note
Installation of the Media Server will take place in much the same way. Where applicable, this guide will highlight differences with a note such as this one.
Insert the installation media into the ACD’s optical drive, and boot from it.
If everything went according to plan, you should be presented with the welcome
screen. When facing it, simply press ENTER to continue.
After a few moments, the installer will ask you what keyboard layout you use.
Use the arrow keys to select the one that matches your current keyboard and
press ENTER to continue.
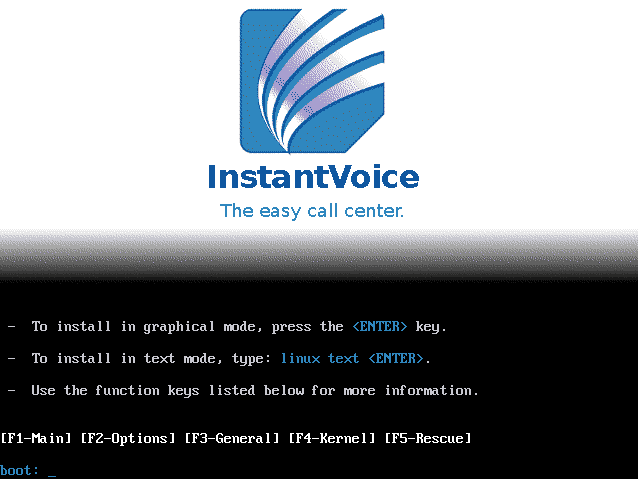
The welcome screen.
Disk Partitioning
Next, you will get to the disk partitioner. There is a great deal of freedom in choosing possible disk layouts, however most possible configurations go beyond the scope of this guide. The default setting for the first dropdown box is the following:
Use free space on selected drives and create default layout.
This will not erase any previous partitions on your drive. However, we recommend installing the system afresh by selecting:
Remove all partitions on selected drives and create defaut layout.
This will erase everything on the disk(s), but the added space and reduced complications will be welcome if this installation is to be used in production. The rest of this guide will assume you chose this last option. If you wish to only use a part of your disk for installing InstantVoice, separate at least 8 Gb for the task.
After partitioning your disk(s), click Next to continue.
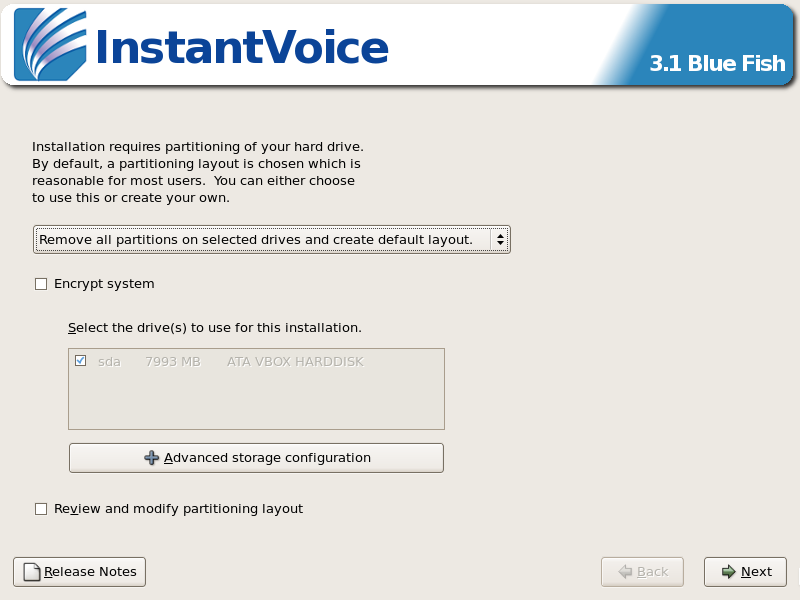
The disk partitioner.
Network Configuration
You should now be facing the network configuration screen. Here, you have the
ability to configure the network as you see fit. However, for best results we
recommend using this ACD’s built-in name resolution service, so each brick
will be configured with a static IP address. Make sure the first available
network interface is selected, then click on Edit. You will see this
interface’s configuration dialog box.
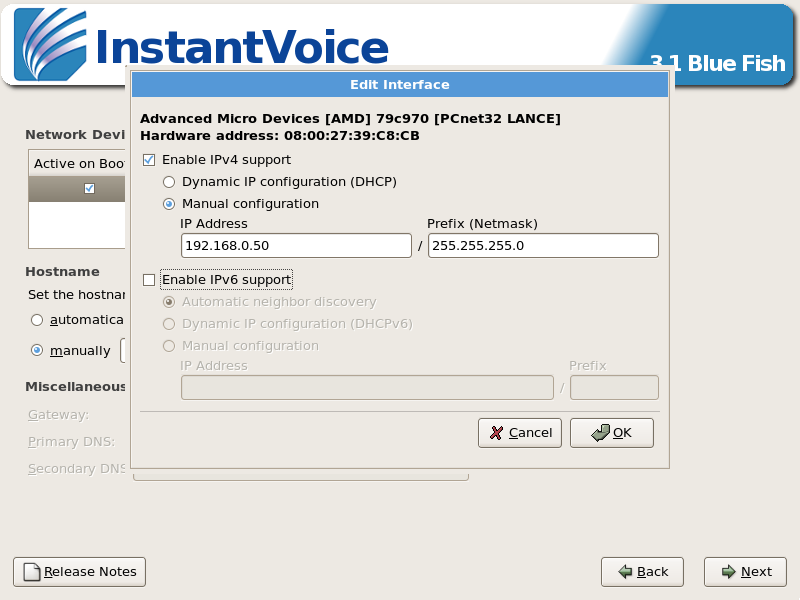
Configuring eth0.
For illustration purposes this guide will use the 192.168.0.0 IPv4 range, so from here on down the ACD’s IP address will be referred to as 192.168.0.50, and its netmask 255.255.255.0. Nevertheless, you can enter a valid IP address and Netmask of your choice, taking note of the values for use later on during configuration. And unless your network uses IPv6, disable it here.
When done, click on Ok to close this window and continue with network
configuration.
Warning
If you don’t configure each primary interface with a static IP address, you must configure corresponding hosts on your internal network’s DHCP and DNS servers. However, this scenario falls outside the scope of this guide.
Next, configure a hostname for this machine. From the two radio-button
options under Hostname, choose manually, and in the text box define an
arbitrary hostname. Enter whatever name you prefer, just don’t use spaces
(when in doubt, stick to letters and numbers). Also make a note of this
value, you will need it later on. For this guide, we will refer to this
machine’s hostname as instantvoice-acd.
Under the Miscellaneous tab, configure the default gateway for this
machine. For illustration purposes we will use a value of 192.168.0.1, but
you will need to use a correct value for your network.
Finally, for Primary DNS enter 127.0.0.1 regardless of you local network
configuration. This will ensure that name resolution works properly for the
cluster. If you don’t do this, the distributed environment won’t work unless
you configure your own network’s DNS server accordingly.
Leave Secondary DNS empty, and click on Next to continue, bringing you
to the regional configuration screen.
Note
When installing the Media Server, make sure to use an IP address that
is different from the one in use by the ACD. Also, take care to enter the
ACD’s IP address in the Primary DNS field (not 127.0.0.1), which
in our example would be 192.168.0.50.
Last Steps
At this point you should be seeing the regional configuration screen. Chose
the closest city to your location using the dropdown or the map. Regional
options will be set accordingly. We also recommend checking the System
clock uses UTC checkbox. After choosing your location, click on Next to
continue.
You should now see the root password configuration screen. Enter an arbitrary
password in the first box, and again in the second. For security, it should
not be based on names or any other dictionary word; we recommend mixing upper
and lower case letters, numbers, and other symbols. When done configuring the
root password, click Next to continue.
Warning
Do not lose the root password! It is essential for future maintenance of the machine, and if lost little can be done in the event of a serious technical problem.
From here until the final reboot, installation will proceed automatically. Sit back for a few minutes while package installation proceeds. When it is done the server will reboot.
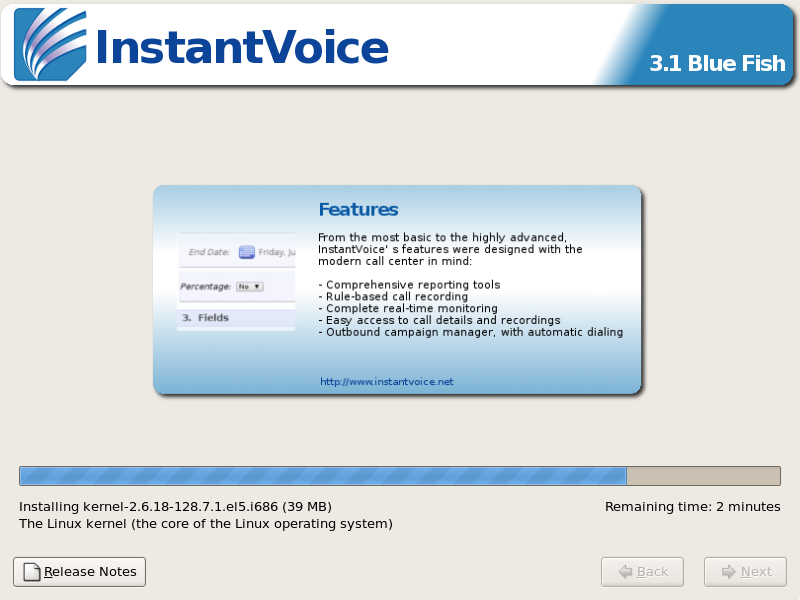
Package installation.
Take care to remove or disable installation media during this stage, otherwise you might be presented with the welcome screen again. If this happens, simply remove the CD or DVD and reset the machine manually to continue.
If all went well during first boot, you should see the server login screen on the terminal. This concludes installation, and we’re now ready to configure the ACD.
Configuring the ACD Server
To start configuring the ACD server, point you web browser to the IP address of the ACD which you specified during installation, in this case, http://192.168.0.50. You will be presented with the InstantVoice homepage.
Logging in for the first time
To log in, first locate the login box on the upper left-hand corner of the
home page. You will log in with the user localadmin and password
localadmin, so fill in the two fields appropriately and then click on
Login.
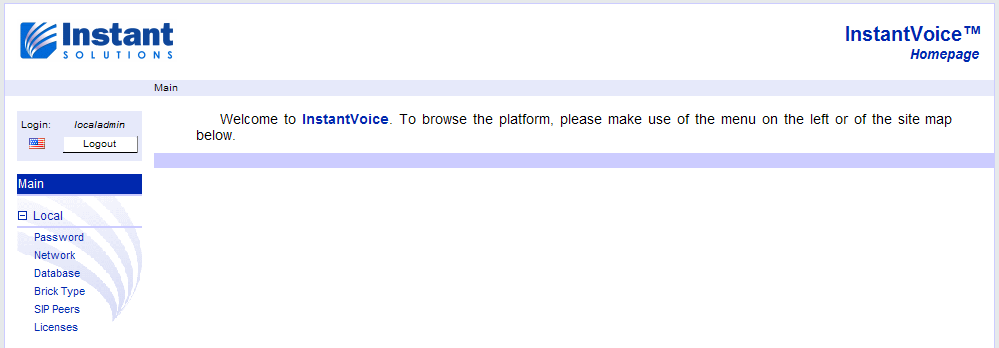
Login page.
Note
Each InstantVoice installation comes with two pre-configured web users, localadmin and admin. The first one, localadmin, is used to configure any and all features specific to each brick in the cluster, such as network addresses or the brick’s type. It is accessible on all bricks. The second one, admin, is only accessible on the ACD itself (or on Standalone bricks which are also ACDs), and is used to access and configure cluster-wide features, such as SIP extensions. More on this later on, under Configuring the Cluster.
If your login was successful, you should see the Local expandable menu tab
on the left column of the home page, just below the Main menu. If not,
please check you typed the login and password correctly, and try again.
Changing the localadmin password
After logging in, click on the Local parent menu to expand it. The first
thing to do is change the default localadmin password to something more
secure. To do so, click on the Password sub-menu, and type in the default
password on the first field (“localadmin”). On the next one, type in a new
password and confirm it on the last field. Click on Save to make the
change, and you should see a confirmation banner if it was successful.
In the future, when logging in as localadmin you will need to use the password you just created.
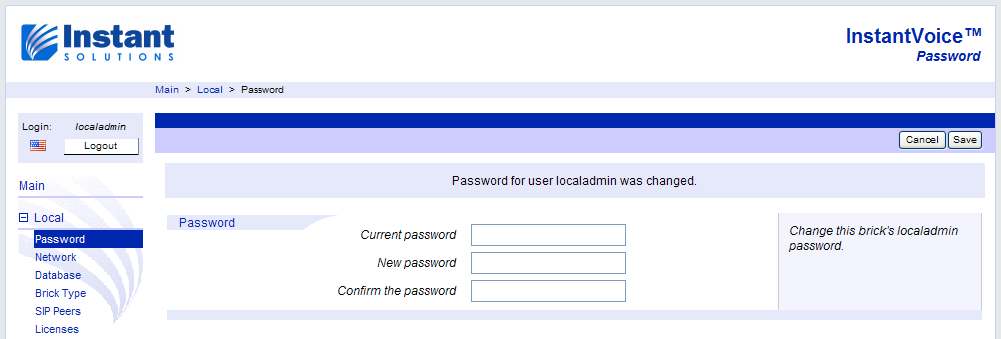
Password successfully changed.
ACD Network configuration
Next, you will check the ACD’s network configuration. Click on the
Network sub-menu on the left-hand side of the page to continue.
Everything should be set to the values you specified during installation.
However, if you need to change anything, from this point on you will do it
here. When and if a change is made, click on Save, after which the web
server will be restarted. Note that if you change the IP address of the
server, you will have to type in a new URL pointing to the server’s new
network location in the address bar of your browser.
ACD Brick Type
The location of the database need not be changed for the ACD, so we will skip
database configuration here. However, we still need to tell the system that
this will be the cluster’s ACD: click on the Brick Type menu on the left.
All installations produce Standalone bricks by default. To change this,
select ACD from the Type dropdown. Since for the purposes of the guide
there will only be one ACD, make sure to check the Active box. We highly
recommend you enter an IP address for the Recursive DNS field, otherwise
external hostnames will not be resolveable by the cluster. The address should
point to a working DNS in a sub-network that is accessible by the ACD. You
can use either your own network’s DNS or a publicly available one.
Warning
A Recursive DNS that can resolve internet domains is required for
license activation. More information on license activation can be found
at the end of this topic, under the section Installing More Agent
Licenses.
This concludes the initial configuration of the ACD. Next, you will install and configure the cluster’s Media Server.
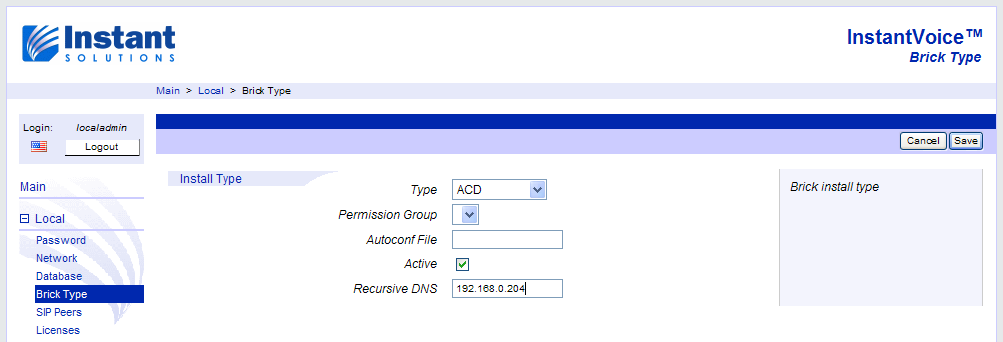
ACD brick type.
Installing and Configuring the Media Server
To install the Media Server, please follow the section Installing the ACD Server, but take note of the following exceptions to the network configuration.
- The IP address of the Media Server should be different to the address used for the ACD. In this guide, we will use the value of 192.168.0.51.
- This brick’s hostname should also be different. In this case, we will use instantvoice-ms.
- Finally, make sure you specify the ACD’s IP address (192.168.0.50 in this example) as the Media Server’s Primary DNS.
All other installation steps can be followed exactly as detailed in Installing the ACD Server.
Beginning Media Server Configuration
To configure the Media Server, point you web browser to the IP address of the you specified during installation, in this case, http://192.168.0.51. As when configuring the ACD Server, you will be presented with the InstantVoice home page. Locate the login box on the upper left-hand corner, and login with the user localadmin, using password localadmin.
Warning
Make sure you are logging in to the Media Server, not the ACD! To minimize confusion, we recommended opening a different browser tab (or window) for each brick.
As with the ACD, start by changing the localadmin password and checking network configuration. Follow the same procedure for these as specified in the sub-sections Changing the localadmin password and ACD Network Configuration, but nothing further.
Database Configuration
Next, you need to tell the Media Server to use the ACD’s database. To do so,
click on the Database sub-menu item in the left column of the page. In
the Hostname field, enter the hostname of the ACD as you specified in
during ACD installation (in this example, instantvoice-acd). Leave the
User name and Password field values as they are.
Note
You could enter the IP address of the ACD instead of the hostname, but if in the future you change the IP address of the ACD, you would have to remember to change it on this page too.
Before saving changes, click on the Test connection button. If everything
is configured correctly, you should get a success message. If the connection
test was not successful, please review network configuration in the ACD and
the Media Server and make sure:
- The bricks have different IP addresses and hostnames.
- The Media Server’s DNS is configured to point to the ACD’s IP address.
- Both the ACD and Media Server are either on the same subnetwork or on mutually accessible subnetworks.
Only click on Save when the connection test is successful.
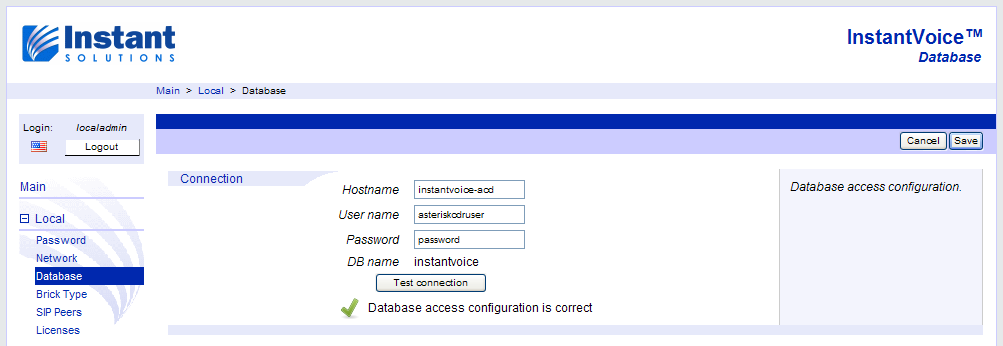
Successful database connection test.
Creating Media Server Trunks
In order to actually make and receive calls, you will need to configure trunks on the Media Server. The first one will be of type Internal, for local calls between extensions, the second of type SIP, necessary for external calls.
Note
Each Media Server needs at least one configured trunk in order to be of any use. On distributed installations, even calls from one extension to another will fail without an Internal trunk!
But first, you need change the Media Server’s brick type from Standalone to
Media Server. Click on the Brick Type sub-menu on the left of the page.
From the Type dropdown, chose Media Server. After you do so, the ACD
Hostname field should automatically display the hostname of the currently
active ACD server, in this case instantvoice-acd. If not, before you go on
go back to the ACD Brick Type sub-section and make sure the ACD is marked
as active.
Next, you will create two trunks for use with inbound and outbound calls. To
add the internal trunk to the Media Server, click on the Add trunk button
in the Brick Type page. You will be presented with the trunk
configuration dialog. Choose a name and enter it in the Name field. You
can name it anything you like, but for this guide we will call it Internal.
From the Type dropdown, choose Internal, and then click on Add. The
Internal trunk should now be listed in the Trunks section.
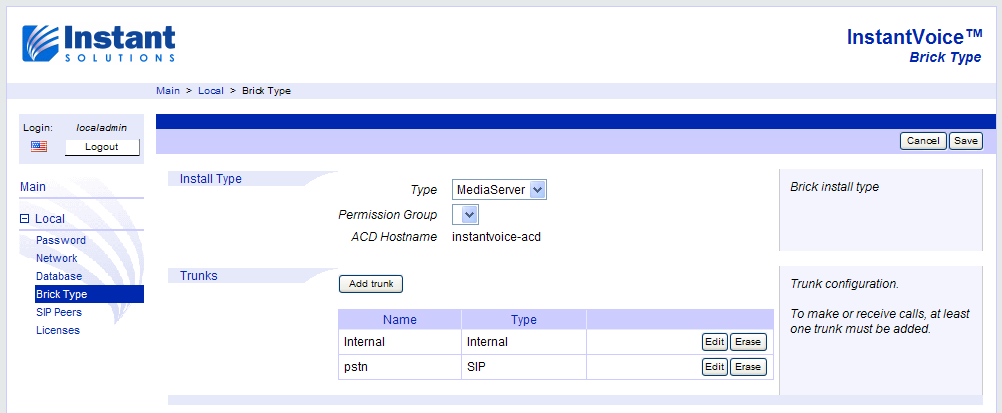
Media Server brick type.
At this point please click Save on the upper right-hand corner of the page
before going on, otherwise, you might lose any unsaved data.
After saving, click on Add trunk again, but this time select SIP from
the Type dropdown. In the SIP Peer dropdown you should see two peers,
one for the ACD and one for the Media Server. However, you can use neither!
You need a new peer, one that can handle inbound and outbound calls. To
create it, you will first need configuration information from your SIP
provider. Typically, the following data is required:
- The internet address where the provider hosts its SIP service.
- The service’s port.
- A user and password to register your endpoint with.
Once you have this information, click on the Add SIP Peer hyperlink next
to the SIP Peer dropdown. You will be taken away from the Brick Type
page, so make sure changes up to this point are saved!
When facing the peer configuration screen, first enter an obligatory name for
it on the Name field. It can be anything you like, but for this example
we will use pstn. The Description field is optional, but the User
field must contain the user name your provider gave you. If a password is
required, enter it once on Password field, and again on the Confirm
field.
Next, open the Network tab. First, uncheck the Dynamic IP box so that
you can specify the provider’s internet host name or IP address on the
Host field, and its port on the Port field. If unsure about the port,
use the default value of 5060.
Other provider-specific configuration may be required. When done, click on
Submit. If any errors were encountered (such as an invalid peer name),
they will be displayed on screen, in which case you should correct them
accordingly and try again.
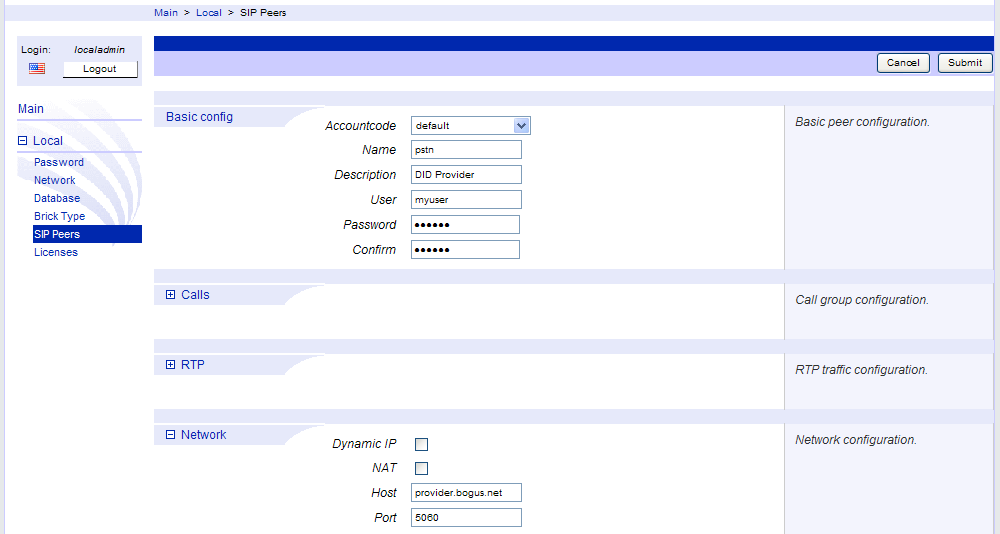
SIP peer configuration.
Now that you have a SIP peer configured for you provider, you are ready to
create its trunk. To do so, go back to the Brick Type page by clicking on
the appropriate menu item on the left-hand column of the page. Once there,
click on Add Trunk, and select SIP from the Type dropdown. Now
click on the SIP Peer dropdown, and select the peer you just created on
the previous step; in this example, we will select the one named pstn. Name
the peer arbitrarily using the Name field. You can use the same name you
used for the peer; we will use pstn again.
Finally, make sure to check the Register checkbox if your provider
requires you to register, click Add to create the trunk, and finally
Save to record all changes.
Note
You may be asking yourself why peer registration is configured for a trunk and not for a peer. The reason is that a SIP peer (such as the one created previously) may be reused by any number of trunks, on any number of Media Servers. However, the SIP protocol specifies only one registration at a time per IP address and port. Thus, SIP endpoint registration per trunk provides a mechanism to control exactly which Media Server will receive inbound calls from a given provider.
This concludes local configuration for the Media Server. Next, you will configure cluster-wide features such as extensions, agents, and queues.
Configuring the Cluster
In this section we will configure everything necessary to get basic telephony and call center features up and running. Specifically, our objectives in this section are:
- To be able to receive an external call through an IVR, send it to a queue, and have it sent to an idle agent.
- To be able to make calls from one extension to another and to an outside line.
To get started, connect to the ACD server using your web browser. If you followed this guide’s examples exactly, type http://192.168.0.50 into the address bar, otherwise use the ACD IP address you configured previously.
This time, you will log in using the admin user. Type “admin” into the
Login field, and “admin” again as the password. Then, click on the
Login button. You should then see a full complement of menu items on the
left, starting with My Account and ending with Reports. If you don’t see
them, or if login otherwise failed, make sure that:
- You are trying to log in with user admin, not localadmin.
- You are accessing the ACD server, not the Media server.
If you logged in successfully, go on to the next section.
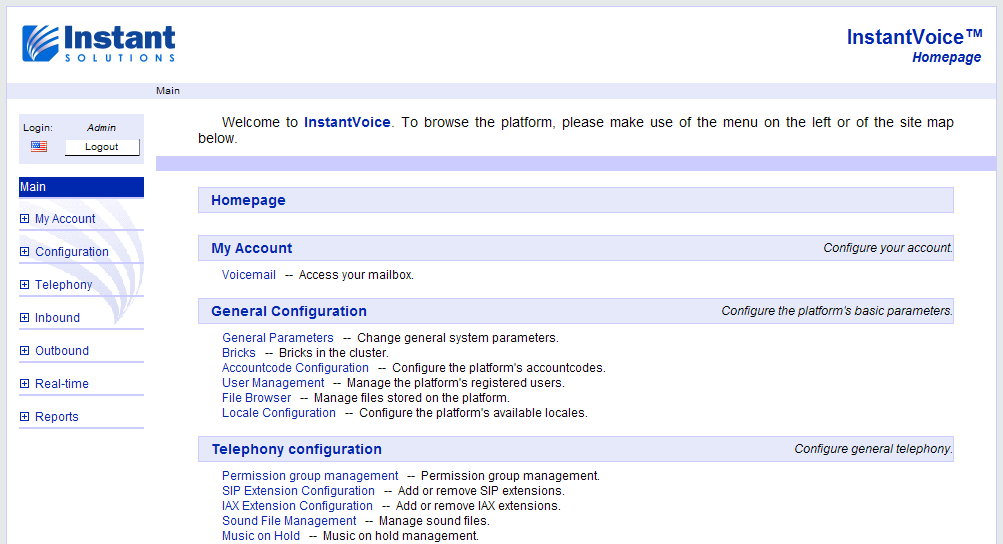
Admin logged in.
Creating SIP Extensions
We will start by creating a few SIP extensions. Locate the Telephony menu
section on the left of the page, and click to expand it. Find the SIP
Extensions menu item under it and click it. You should then be facing an
empty SIP extension page.
Find and click on the Add button on the upper left hand corner, and you
will see a page similar to SIP peer configuration. The principle is the same,
with some added options and conventions. For starters, it is possible to add
a range of SIP extensions at one go. That’s precisely what we’re going to do,
so check the Enable range box at the top of the Basic Config tab.
We’ll be using the default accountcode, so leave that dropdown alone. On
the Extension field, type in the number of the first extension. Only
numbers, such as 1001, are accepted. On the next field, Final
Extension, enter the number of the last extension, for example, 1006.
Finally, check the box labeled Password is extension number. This will
create each extension with a password equal to its number. For instance, a
SIP phone registering at extension 1003 will need to use password 1003.
Alternatively, do not check that box and simply choose one password that will
be used on all created extensions.
When done, click on Submit. You should then see a list of extensions
which you just created.
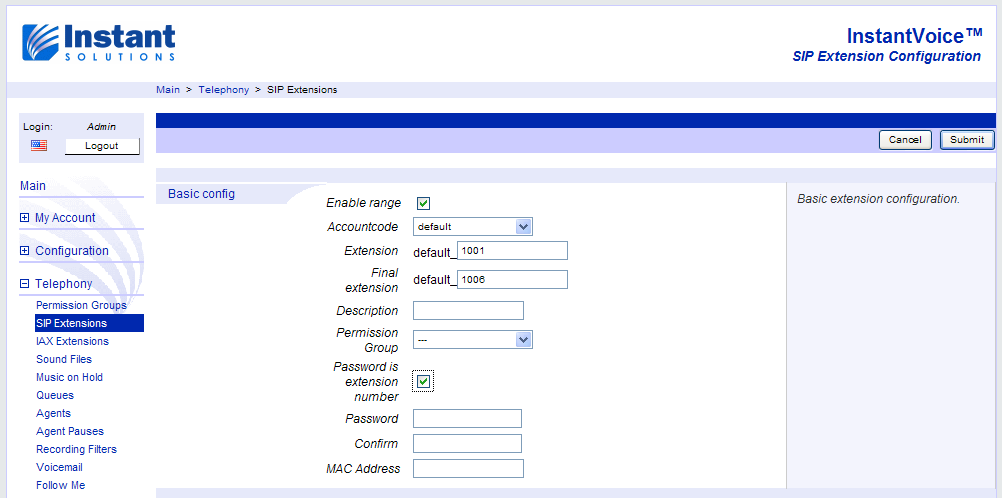
Creating a range of SIP extensions.
Note
All SIP extension users are prefixed with that extension’s accountcode. This is so that if desired, a single InstantVoice installation can have the same extension number in use by two different accounts. It is implicit in this setup that one accountcode’s extensions cannot dial to the ones on another accountcode.
To test your work, at this point you must register a SIP phone using one of the extensions that were just created. Configure your phone to register at the ACD’s address, in our case 192.168.0.50. The authentication user string is the chosen extension number prefixed with its accountcode: in our case, default_1001, and the password, 1001. If everything was properly configured, your phone should be able to register successfully with the ACD (even though making calls won’t be possible yet).
Warning
In distributed installations, SIP phones should always register with the ACD, not the Media Server!
Creating a Queue
Once you have created a few extensions and successfully registered at least one SIP phone, it is time to create a call queue and an agent, in order to be able to receive inbound calls.
You will first create a basic call queue. On the main menu on the left, click
on Queues, under Telephony. There are none as of yet, so click on the
Add Queue button.
On the edit page, start by entering a queue number on the Number field.
Much as an extension, this number will uniquely identify a queue, and as such
it is mandatory. We will use the number 10 for futher reference in this
guide. The Description field is optional, but useful for identification
later on: we will use simply Queue 10.There are many other queue
configuration options, but they fall beyond the scope of this section.
However, default values will probably meet most of your initial needs.
When done, click on Save.
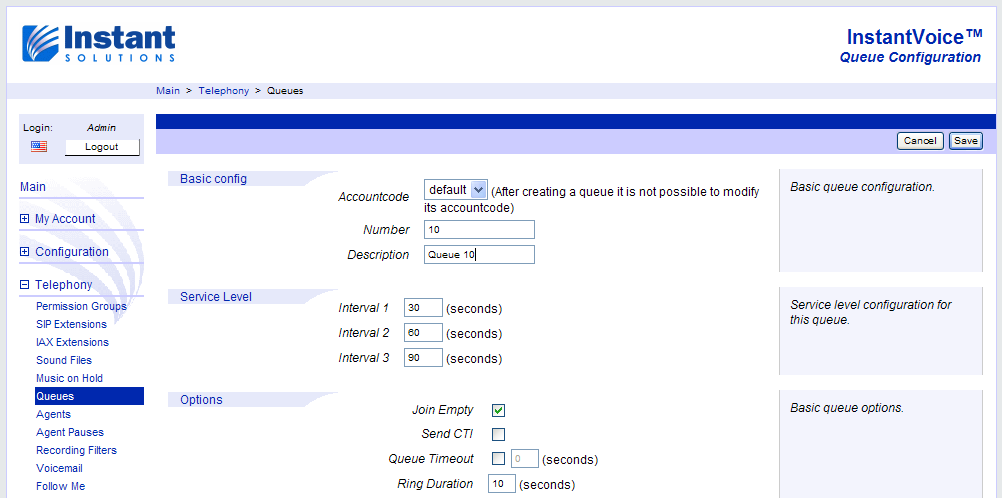
Adding a queue.
Creating an Agent
After creating Queue 10, you will be able to create an agent. Under the
Telephony menu, click on Agents.
Creating an agent is a three-step process: first you create the agent, then
its available lines, and finally you assign it to one or more queues. To
start, click on Add agent.
On the first step, in the appropriate fields give the agent a Number
(which must not be the same as any extension number), a Name, and
optionally assign it a numeric Password. This password will need to be
dialed in at the extension for critical agent operations such as logging in or
logging off, so we recommend keeping it short. For illustration purposes we
will use 2001 as the agent number, Agent 2001 as its name, and 123 as
this agent’s password. When done, click on Next.
On this screen you can control how many simultaneous calls an agent can make or take. For instance, if you want an agent to be able to receive two calls simultaneously, add two inbound lines. If you want it to be able to receive a call on one line and make a call on another one, add one inbound and another outbound line. If you don’t care if the agent makes or receives calls on a given line, create bidirectional lines.
For this guide this agent will only need one bidirectional line, so simply
click on Add line to add it, and then on Next to continue.
Finally, in the last step we will assign this agent to the queue you created
previously. In our case, this is Queue 10. Check the box next to the
queue, and click Save to finish creating this agent. It should then show
up on the agent list.
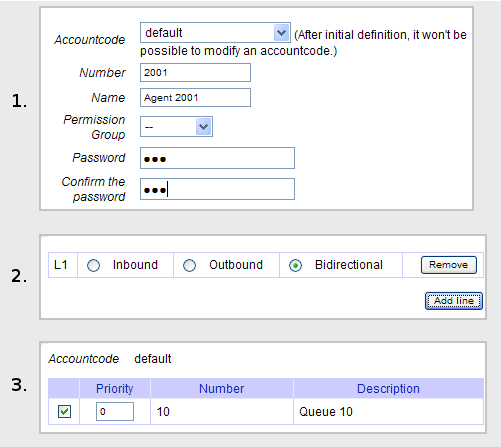
Creating an agent.
Logging in with an Agent
The first thing to do after creating the agent is to actually log it in at one of the SIP extensions you created previously. Assuming you’re going to log in agent 2001 at extension 1001, simply pick up the phone at that extension and dial:
*02001
Where *0 is the global login command, and 2001 is the agent number. If
you configured a password, the IVR will prompt you for it. Assuming the
password for this agent is “123”, dial the following when prompted:
123#
After this, if everything went according to play you should hear an “Agent logged in” message. This means that InstantVoice now recognizes Agent 2001 as being logged in at extension 1001 and expecting calls from Queue 10.
Note
Other important agent commands are:
*1to pause.*2to unpause.*3to log off.
As long as you issue them at the extension the agent is logged in, you do not need to specify the agent number after these commands. Nevertheless, you will be prompted for the agent password if one was configured.
You can also pause, unpause, and log off agents at the realtime web
interface. To use it, enter the Agents page under the Real-time
menu.
Building a Simple IVR
The basic flow for inbound calls in InstantVoice is the following:
Trunk --> SLN --> IVR --> Queue --> Agent
In more detail:
- Trunk: One of the configured trunks receives a call from the PSTN.
- SLN: Every PSTN call has a Subscriber Line Number, or SLN, that identifies what number was dialed by the calling party. InstantVoice uses the call’s SLN to forward it to a specific IVR.
- IVR: Based on a series of factors the IVR in turn decides what Queue (if any) to forward the call to.
- Queue: The Queue holds the call until an Agent becomes available.
- Agent: The call is finally answered by an Agent.
You have already configured a trunk, a queue, and an agent, but before your queue can actually receive calls, you will need to create a simple IVR that forwards calls into it and an associated SLN that tells InstantVoice to route a given call through. Let’s begin with the IVR.
Click and expand the Inbound menu section on the left of the page, then
click on VIVRE to access the Visual IVR Editor main page. Click on
Add, and fill in the IVR Name field with a name for your IVR (in this
guide, we will refer to it as “MyIVR”). Ignore the other fields and click on
Submit to save, after which you should now see an entry for your IVR on the
page.
At this point you will create a very simple IVR that prompts the calling party to dial “1”. If that number is dialed the call will be forwarded to the queue you created previously. Otherwise, the caller will hear a message and the call will be hung up. The basic mechanics are simple: for each interactive menu you want the calling party to hear, you must create a module. To jump from one module to another, you will test user input and forward the call accordingly.
Click on the previously created entry’s Edit IVR button to start creating
the actual structure of your menus. A new window will pop up, in which you
will see two buttons, Save IVR and New Module. Click on New Module
now to generate this IVR’s first module. It will appear immediately to the
right. You can click on its title bar and drag the module anywhere you like
on the work space. Try it!
Newly created modules are always named “NewModule” by default. Click on its
Edit button and select the “NewModule” string to change it. For
illustration purposes we suggest using “Main” because this is where new calls
will be directed, but you can use any name you like, as long as you don’t use
spaces, punctuation, or other special characters.
Modules are composed of lines. Click on New Line to add a new one. The
first thing to do is welcome the calling party, so from the dropdown on the
left choose the tts command and enter a phrase such as “Welcome to
InstantVoice, please dial 1 to talk to an agent.” Next, create a new line and
select the waitdigits command. This command tells the IVR engine to expect
input from the caller in the form of digits. Leave its options on its default
values, but since the caller will only enter one digit, on the Max digits
column enter “1”.
Note
tts stands for Text To Speech: text you enter on this command will be
synthesized and played back to the caller. Licenses for the better quality
AdvancedTTS engine, which supports a range of different languages, must be
acquired separately. Although the tts command only supports English,
it can be used freely.
To test what the calling party dialed in response to the prompt, create one
more line and select the ifvar command . Under the Variable Name
column, type in the variable name that was used on the line above (“input”, by
default). Under Value, type in “1” to check if the caller dialed that
number. The last two dropdown boxes will be used to select the destination of
the call depending on if a “1” was entered or not, but leave them blank for
now.
On a new line, select the tts command once more. If the call gets here,
the caller did not dial a 1, so enter a message such as “Invalid option,
goodbye!” Finally, on the last line of this module select the hangup
command to end the call.
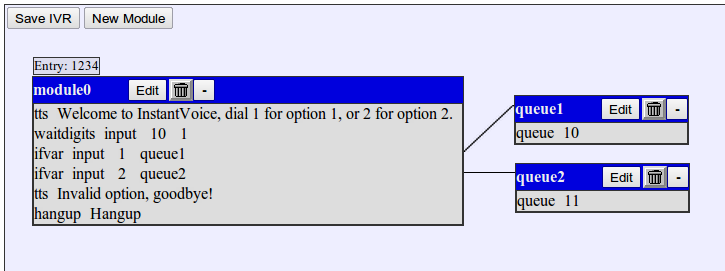
A simple IVR.
At this point, click on the Ok button to close this module temporarily, and
then click on New Module at the top of the workspace to create a new one.
This module will be where the call is forwarded if the caller dials a “1”, so
name it “Queue”. It will only contain one line; create it and select the
queue command from the first dropdown. Under the Queue column you
should see a dropdown listing the queue you created previously. Select it, and
click on Ok to close this module.
You can now tell the “Main” module to forward the call to the “Queue” module if
the caller dials “1”. To do so, on the “Main” module, click on Edit. On
the dropdown under the Destination True column of the ifvar line,
select the “Queue” module you just created, and leave the Destination False
dropdown empty: this tells the IVR to jump to the “Queue” module if a “1” was
dialed, or to continue to the next line if not.
Click on Ok to close the “Main” module once again. Notice that now the
“Main” and “Queue” modules are joined together by a line, indicating their
relationship. When you have more than 2 modules, we recommend
dragging-and-dropping them so that the IVR’s structure is made visually clear.
Each module’s position will be saved and restored the next time you open the
IVR!
At this point, make sure to click on Save IVR. After you do so, close this
window and return to the main web interface.
Warning
Make sure to always click on Save IVR before closing the window,
otherwise your work may be lost!
You still need to create an SLN that points to this IVR, otherwise InstantVoice
cannot forward inbound calls to it! Under the Inbound menu on the left,
select the SLNs page. Click on Add, and in the SLN field on the
edit page, enter the actual DID number you provider sends with each call, for
example, “5552345”. From the IVR dropdown, select the IVR created
previously (“MyIVR”, in our example), and from IVR Module select that IVR’s
“Main” module. Finally, check the Active box and click on Submit.
This concludes your initial inbound call setup. Try it out by calling your DID. Just make sure to have at least one agent logged in (as described in the Logging in with an Agent section), otherwise no extensions will be rung!
Routing Outbound Calls
If you want to make outbound calls through the trunk you configured previously, or even calls from one extension to another, you will need to create appropriate routes. Simply put, routes are how you tell InstantVoice where each call goes, how much they cost, and who can use them. For maximum flexibility, routes are defined on a priority system based on the number that is dialed, and who is dialing.
Let’s say you would like to have it so that any 4-digit number dialed at an
extension makes a call to the extension at that number, and all 8-digit numbers
are calls to be completed by a SIP trunk. Start by opening the Routing
page under the Outbound menu and then clicking on Add route.
First, enter a suggestive name on the Name field, such as “Internal calls”.
On the Expressions tab, you will enter a pattern that will be used to match
numbers as they are dialed on an extension. Roughly speaking, route
expressions are read by InstantVoice in this way: “Does the dialed number start
with the numbers in this expression?” This implies that you can simply enter a
straightforward number, such as:
1001
If you dial “1001”, this route will be matched. However, it will also match “10010”, “10012345”, or any other number that starts with “1001”. To tell InstantVoice to match only 1001, you need to add a “$” to the end of the expression, like so:
1001$
However, this is still not ideal. You want to match any 4-digit number, not just 1001, and entering 9,999 expressions would be too time-consuming. To do so, you would use a character class. For instance, to match any single digit from 0 up to 9, you would write:
[0-9]
So to match any 4-digit number, create an expression exactly as the following,
and click on Add:
[0-9][0-9][0-9][0-9]$
You only need this single expression for internal calls, so click on Next
to continue.
On the next step, to specify the trunk through will calls that match this route
will be routed to, click on Add Trunk Group followed by Add Trunk.
Since this route will be used for extension-to-extension calls, select the
“Internal” trunk that was created previously (see the section entitled
Creating Media Server Trunks). Click on Next when done.
On the third and final step you will configure the extensions that can use this
route. From the top dropdown chose SIP Extensions. You should then see a
list of all configured SIP extensions on the left-hand box. To give them all
access to this route, click on Select all, followed by Allow. This
will transport to the right-hand box, which lists all entities permitted to
access this route. Click on Save when done.
At this point it is already possible to make calls between extensions, for instance by dialing “1002” at extension 1001. To make external calls, however, you will need to add another route. Follow the same procedure specified above for the “Internal calls” route, except:
- On the first step, name the route “External calls” and use the following expression for 8-digit numbers:
[0-9][0-9][0-9][0-9][0-9][0-9][0-9][0-9]$
- On the second step, select the “pstn” trunk instead of the “internal” one.
After saving, you should be able to make outbound calls. If not, please check your outbound trunk’s peer configuration and make sure everything is set properly according to your provider’s specifications.
Note
If you’re having routing problems, another important step in
troubleshooting is to check if the number being dialed is being matched by
an existing route. The main routing page provides a simple mechanism to do
so. On the Filters dropdown on the upper right-hand corner, select the
type of entity that is trying to make the call, such as “SIP Extension”.
On the next dropdown, choose the actual entity, such as extension “1001”.
Finally, on the input box to the right, enter the exact number that will be
dialed and click on Filter. If no routes are shown, the selected
entity and number to dial do not match any routes.
This concludes basic cluster configuration, which should give you a solid base to build on.
Installing More Agent Licenses
Installing agent licenses is very simple. Once you have received an email with
your license codes after ordering from http://www.instantvoice.net, access your
ACD ou Standalone server’s web interface with the localadmin account (see the
section entitled Logging in for the first time), and enter the Licenses
page under the Local menu. Once you have done so click on the Add
License button on the right. On the text field that shows up, paste the
license code (the one that starts with “IV-“) and click on Register.
Warning
On distributed installations, licenses only need to be activated on the ACD server!
As noted on the dialog box, the server needs to be able to access the internet for license registration to succeed. Permanent access is not required, however: you may disable internet access once your licenses are registered.